Cheerio bird feeder!

We love making bird feeders for the garden birds and this week my daughter decided to make another feeder using cheerios and pipe cleaners. We have made these type of feeders for the last few years as they are very simple and use her favourite cereal! My daughter loves making them as she is a huge animal lover (she’s wanted to be a vet since 4 years of age)! She loves that she is able to help the birds at the same time as getting a little crafty! Being able to watch the birds feed after is a huge bonus for her!

To make your bird feeder you will need – cereal loops, pipe cleaners and wool / thread to hang.

Begin by bending your pipe cleaner into the shape you would like your feeder to be. My daughter chose to make two heart shapes, but you could do anything! Don’t tie or knot the ends yet so that you can thread the hoops on.

IMG_0689 (2).JPG

Then gently start threading the cereal hoops onto the pipe cleaners. This is a wonderful activity to help encourage the little ones fine motor skills and hand eye co – ordination!

IMG_0693.JPG

Keep threading the cereal hoops until the pipe cleaners are full – just leave a tiny space at the end so that you can twist the pipe cleaner to secure it together.

IMG_0695.JPG

Next attach your second heart to the other like this –

IMG_0698.JPG

Then tie some thread / wool to the top so that you can hang it up in the garden!

My daughter chose to hang her feeder on a tree where she can watch the birds feed from our home.

IMG_0704 (2).JPG

We love our home made bird feeders and think they look very cute hanging in our garden!


Collage nature pictures!

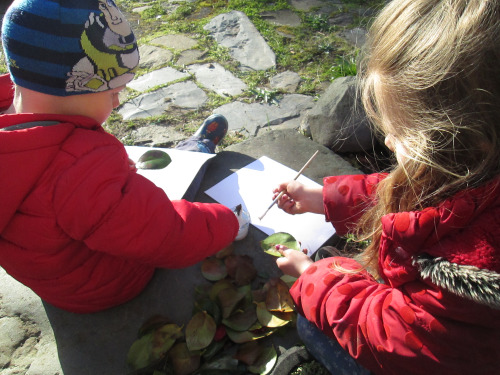
A little while ago myself and the kids decided to make some collage nature pictures. These pictures are such good fun and really get kids using their imagination to create their very own pictures!

We went for a little walk and collected up some different natural objects including fallen leaves, grass, fallen petals etc. We pretty much collected anything which we thought would make a good material to make our collage pictures with! Just make sure you aren’t picking anything toxic up! (This activity provides a good opportunity to talk to your kids about things that are safe to pick up and things that aren’t). I also encourage my little ones to only take things that have fallen, and not still growing.

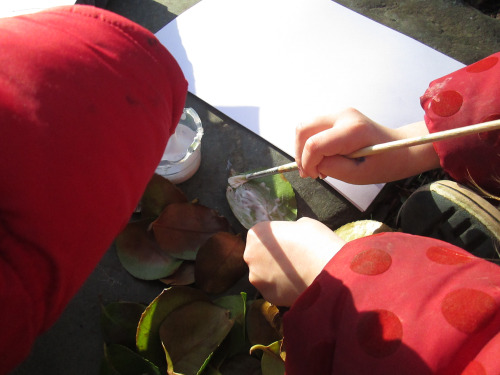
Once we had our collection we headed home and sat outside to create our art work! All you need extra is a little glue and some paper.

Using your glue, stick down the different things where you would like them – it is a good idea to have a play around first to see what you want to create!

leaf pic1

leafpic2.jpg

leafpic3.jpg

leafpic4.jpg

l;eafpic5.jpg

The kids love making these beautiful nature collages. I think they look wonderful and make a nice change to the usual paintings! I love that depending on the time of the year that you make them, you will be able to use different items, so will get different looking pictures each time! We can’t wait for Summer to get out and about and make some more pretty collage pictures!

leafpic6.jpg

Winter play dough!

Keeping the kids busy during the school holidays is sometimes hard, especially in February when the weather is less than pleasant here in the UK! I decided to make some play dough yesterday to keep the kids entertained for a while. I thought it would be a cute idea to make it a winter themed play dough by using a little blue food colouring, to give it an icy cool look.

To make your play dough you will need – 2 cups plain flour, 1 cup cold water, 1 cup salt, 1 tbs oil and food colouring (we used blue but you can use whichever colour you like).

Start by mixing the flour and salt in a bowl.

IMG_0557.JPG

Next add the water, oil and food colouring. (If you are using liquid colour you will just need a few drops, gel colours tend to need more though – we used a whole tube of gel colour and the colour was nowhere near as strong as I wanted)!

Mix together and then knead with your hands until it forms a ball. If the dough is too dry add a little water, if it is too wet add a little flour.

IMG_0559.JPG

Now your play dough is ready to use! I gave the kids a little bowl with sequins, feathers, pom poms and beads in, as well as cutters and rolling pins. ( Just make sure that what you are giving your little ones are age appropriate to avoid any nasty accidents).

We then set up a little shop with a till and sandwich bags to use as the kids love playing bakery. They ‘bake’ me biscuits and cakes with the play dough and I am the customer! We do this quite a lot and I change the type of play dough we use. One of the kids favourite play dough is chocolate play dough. You can find the recipe we use here!

IMG_0566.JPG


IMG_0573.JPG

IMG_0576.JPG

IMG_0577.JPG

IMG_0581.JPG

We had a lovely afternoon creating and playing with the play dough! A lovely activity for the kids which doesn’t cost the earth!

Hope you are all having a lovely week!

A (teeny) bit of sun!

So this morning was glorious! Beautiful blue skies and sunshine! I was ecstatic – we have had such a long period of constant rain, dark clouds and general greyness that just the sight of the sunshine made me so happy! Isn’t it amazing that just a bit of sunshine seems to wipe out the months of grey in an instant? Like medicine for the soul!

Currently the kids are on their half term holidays so I suggested a trip to the park, whilst the weather was so lovely and dry. They chose to ride their bikes (no problem – it gets us there so much faster than legs alone!) and off we went. We were merrily going along and not far from the park when it decided to start hailing…… Not just a few little hailstones, but full on hail coming down at the speed of mini jet planes! I just could not believe it…… We raced to the park and sheltered under the climbing frame (managing to squeeze ourselves in like sardines)! Even my daughter couldn’t understand what had happened to the weather – “Mum, I am getting so sick of this weather now. It was nice a minute ago!”

IMG_0586.JPG
The aftermath!

My son found it hilarious though and decided it was his duty to try and squash every piece of hail on the floor – needless to say we were at the park quite a while………..

IMG_0587 (2).JPG

I hope you are all having a fantastic week wherever you are!

Super Sunday!

Today me, the hubby, kids and Sammy dog made the most of the ‘temporary’ dry weather and headed to our local forest park. (I am so sick of the rain already)! It is one of our favourite places to visit as a family as it is free (hooray!), completely beautiful and has lots for the kids to do! There are different trails you can walk which vary in skill level, different bike trails (including a practice area), a lovely cafe, play parks and an animal trail. We decided to walk the animal trail today as the kids love it! This is a trail designed for families on which you try to spot different wooden animals hidden along the trail. Before you begin, you get a leaflet from their information centre which gives you a different clue for each animal that you need to find.

IMG_0528.JPG


IMG_0493

IMG_0532

The kids have great fun working out which animal they need to find from the clues and then trying to spot them. The trail is set in the forest which is so beautiful and pretty, with lots of streams and places to rest if little legs get tired!

IMG_0487 (2)

IMG_0509

IMG_0504

IMG_0517 (2)

We also visited my daughters favourite tree – the fairy tree! She gets super excited seeing it! I must admit that there is a definite aura of magic around it!

Hope you have all had a wonderful Sunday too!

Winter tree pictures!

The weather has been pretty horrid here recently. Rain and very strong  winds are all we seem to be having at the moment! I find myself longing for the sunshine again….or snow. Anything apart from this continuous downpour!

One particularly rainy day last week my five year old son and my two year old nephew were getting a little bored so we brought out the craft box and decided to make some Winter tree pictures!

To make your own winter tree pictures you will need – coloured paper/card of your choice (we chose blue as my son wanted it to look like the sky), green paint, white paper, hole puncher, glue, pom poms and crayons.

IMG_0070.JPG

Begin by making a stencil to be your tree shape. I used a triangle shape as it is very simple and looks pretty effective! Next dip the pom pom into the green paint and print the shape onto your coloured paper/card by pushing the pom pom up and down onto the paper. My son and nephew printed two trees onto their paper. If your little one is struggling with holding the pom pom you can pop a clothes peg onto it, which will act as a handle.

IMG_0071.JPG

IMG_0076.JPG

Whilst the paint is drying make your ‘snowflakes’ by punching out white paper circles using a hole puncher.

IMG_0073.JPG

When your paint is dry glue on some of the paper circles to be your falling snowflakes.

Next tear some white paper into strips. This will be the snow on the ground. I like tearing the paper rather than cutting it as it looks a little more realistic with the bumps and curves instead of it being just a straight line!

IMG_0090.JPG

Next draw on tree trunks with a crayon.

IMG_0098.JPG

The boys had great fun making their winter tree pictures and they have certainly brightened up the place. I just wish we had some real snow now!

Happy New Year – blwyddyn Newydd Dda!

Happy new year everyone! ( Or blwyddyn Newydd Dda! as we say here in Wales! ) I hope you all had a fantastic Christmas time and new year. We had a wonderful time! We kept up with our family traditions and have been out and about in the fresh air lots! One of our favourite places to go is a woodland walk not far from our home, which has some beautiful waterfalls, so we visited on Christmas Eve ( complete with Santa hats of course)!

IMG_3714.JPG

We also went on a very scenic walk on one of the Welsh Coastal Paths which passes plenty of horse fields (much to the kids delight)! This is one of my favourite places ever and is a great place to clear your head. I love running along this trail when the weather brightens a little!


IMG_0032.JPG

The Christmas Eve parcels went down a treat too! The kids loved the home made reindeer food and they had great fun sprinkling it on the lawn on Christmas Eve!

IMG_3719.JPG

IMG_3725.JPG

It has been so nice just spending time together as a family. It sometimes feels that in the present time we don’t tend to just sit, breathe and spend time together. Modern day living has people running around on full speed hardly daring to take a breath. One of the things I will be trying to focus on more in 2016 is to sit and just enjoy the moment more. Have any of you made any resolutions? I usually make the same ones each year so this year I am going back to basics. I aim to spend more time sitting and savouring the little moments. Time seems to fly by so quickly these days and those little (precious) moments can get lost in the mayhem of everyday living.

grateful2

I hope you all have a brilliant 2016 full of love, health and happiness. Let’s all make some amazing memories! 🙂

A home made gift – Hot Chocolate spoons!

My little ones school broke up for their Christmas holidays the other day. They decided that they wanted to get each of their teachers a little gift to say thank you and Merry Christmas (Diolch and Nadolig Llawen as we say here in Wales)!

original_large-nadolig-llawen-decoration.jpg

We do this each year as their teachers do such a wonderful job through the year and don’t really get much appreciation or acknowledgement. I think a little thank you will always go appreciated!

Their school is a small, village school and they love going there! They used to attend a much larger school and my daughter really didn’t like it. She has developed and progressed so much since changing schools and I am very grateful to the teachers and staff for all the work which they do. The school is more like a family, and everyone’s opinions are listened to, from the head teacher to the nursery children. It is very much a community focused school too which I love! As it is such a small school there is a smaller number of staff. This means that my kids always want to give every staff member a little gift, including the cooks, cleaner and helpers!

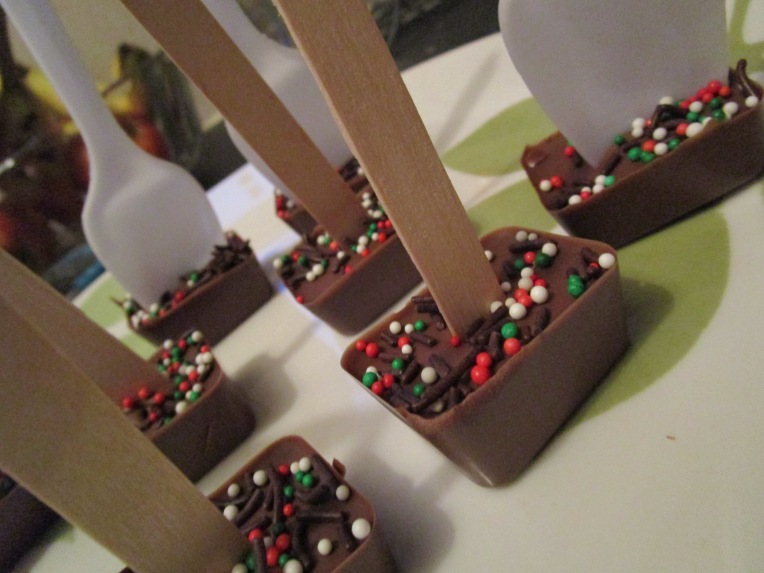
We usually give shortbread or butter biscuits as gifts, but this year I thought we would do something a little different. We decided to make Hot Chocolate spoons. We love Hot Chocolate spoons in our home as they are super simple to make, look so pretty and taste amazing!

To make Hot Chocolate spoons you will need – chocolate, plastic / wooden spoons or wooden lollipop sticks and sprinkles / decorations.

Begin by melting your chocolate in a jug in the microwave. Check it frequently to make sure it doesn’t burn! Once it has all melted, pour into an ice cube tray.

IMG_3637.JPG

Next chill in the fridge. You need it to be of a solid consistency before you can put your spoons / sticks inside, but not completely set – a sort of soft solid! You will be able to tell if the chocolate is set enough to put the spoon inside. If it has not set enough the spoon will not stand upright alone. If this is the case, chill it for longer!

IMG_3653.JPG

When you have the right consistency push your spoons / sticks into the chocolate and add your decorations (we used green, red and white hundreds and thousands and chocolate strands to make them look more festive). Mini marshmallows also look cute! (My kids love this part as they get to go sprinkle crazy)! Next, chill again, until completely set and solid. Gently push them out of the tray.

IMG_3668.JPG

I then wrapped them in spotty cellophane and added ribbon to make them look pretty and extra special!

These taste so good swirled into hot chocolate to make it taste extra chocolatey or warm milk to make chocolate milk. A very delicious treat!

IMG_3673.JPG

The teachers loved their home made gifts and said what a lovely, thoughtful, yummy gesture it was!

Nadolig Llawen to you all!

Paper plate windows!

One of my daughters favourite craft activities is making paper plate portholes. She usually makes one every summer and this year was no different!

Recently she decided she wanted to make something similar, but with a Winter theme rather than the Ocean. She chose to make a paper plate window with a Winter scene.

To make your paper plate window you will need – paper plate, paints, paintbrush, glue, coloured paper / card and coloured cellophane.

Begin by painting a scene onto your paper plate. My daughter chose to paint some Winter scenes, but you can choose whatever you like!

IMG_3296.JPG

Once your paper plate is dry glue a strip of coloured paper or card across the top of your paper plate. This will be your ‘curtain rail’! Then cut some curtain shapes from coloured cellophane and glue to your strip of card. Make sure you leave a gap between the curtains so that you can still see some of the painted scene.

IMG_3598.JPG

IMG_3596.JPG

My daughter made a few of these pretty window plates. She was a little disappointed though at how quickly the cellophane creased up and said she would quite like to use material pieces next time she does this activity, ‘so that it looks more realistic’!

I think they are very pretty and make a nice seasonal change to the portholes. I do think my daughter will be doing a follow up of this activity though as she is very eager to see how it turns out using material pieces instead!