Herby cheese muffins!

The soundtrack to the summer school holidays this year has been “Mum, I’m hungry”……. I feel like I am being eaten out of house and home! I am always trying to find snacks for the kids which are cheap and easy to make. I decided to make some of my favourite herb and cheese muffins this week – super simple and yummy!

Recipe for herby cheese muffins – 280g plain flour, 1 tsp salt, 125g grated cheddar cheese, 3 – 4 tsp dried mixed herbs, 2 eggs, 75g melted butter and 200 ml milk.

1 – Preheat oven to 190c and line a muffin tin with cases.

2 – Sieve the salt and flour into a bowl and mix. Add the herbs and cheese and mix thoroughly.

IMG_3109.JPG

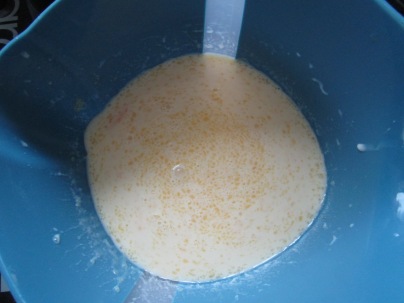
3 – In a different bowl, beat the eggs, butter and milk together, then pour into the dry ingredient bowl.

IMG_3111.JPG

4 – Stir the ingredients together to form a lumpy batter.

IMG_3112.JPG

5 – Spoon the batter mixture into the cases and bake for approx 20 – 25 minutes, until firm.

IMG_3113.JPG

IMG_3116.JPG

These savoury muffins were so easy to make and use ingredients which can usually be found already in your kitchen. The kids really enjoyed them and they disappeared super quickly (note to self – make two batches next time)! They also taste really good spread with a little butter!


IMG_3118.JPG

We hope you like our herby cheese muffins! Let me know what you enjoy making for the kids snacks (Hey, I need more food inspiration here)!

Happy Sunday guys!

Beautiful blackberries (and a simple crumble recipe)!

The Summer this year here in Wales is turning into a bit of a wash out! However, I still like to get the kids out and about in the ‘very fresh’ air and the other day was no exception. I wanted an activity which was free and fun for the kids, so I decided to take them blackberry picking. We had spotted quite a few blackberries previously in our area so I thought it would be a nice idea to go blackberry picking. (We try and do this each year as the kids love it. You can see our post from last year here!)

We donned our waterproofs and set off, plastic tubs in hands to grab some of those yummy fruits!

IMG_2956.JPG

The kids love trying to spot and pick the blackberries, especially my two year old nephew who thought it was great fun! (Remember to supervise the little ones to make sure that nothing inedible is being picked – I find this activity provides a brilliant opportunity to talk to your kids about what is safe to pick and what isn’t).

IMG_2957.JPG

IMG_2961.JPG

IMG_2967.JPG

Once we had enough blackberries we headed home. I added some strawberries to our collection of blackberries and we all made a very yummy berry crumble!

IMG_2975.JPG


IMG_2979.JPG

Recipe for berry crumble – 300g berries, 200g caster sugar, 180g chopped butter and 250g plain flour.

1 – Preheat the oven to 200c. Lightly grease your ovenproof dish with butter, then arrange your berries at the bottom.

2 – In a separate bowl mix together the sugar, flour and butter with a fork until it looks like crumbs.

3 – Bake in the oven for approx 30 minutes or until golden.

4 – Serve with ice cream, cream or custard and enjoy!


We hope you are all having a lovely weekend, whatever you may be doing!

I have (finally) started to master the piping bag (and couldn’t be happier)!

I will let you into a little secret….. I have been trying for what feels like forever to master the art of piping icing! I have wanted to be able to recreate those pretty little peaks and roses for so long and have tried and failed endless times.

I was speaking to one of my friends at work about yet another disastrous attempt when she told me about a fail- proof recipe for buttercream which she uses for her piped icing. She wrote it down for me and off I went (not feeling too hopeful to be fair)!

Buttercream recipe – 225g sieved icing sugar, 85g butter, 1-2 tbs milk and a few drops of vanilla essence.

1 – Mix all the ingredients into a large bowl until smooth. Make sure that it is thoroughly mixed to ensure it will go through the nozzle of the piping bag. I also added  a little cocoa powder to give a chocolate flavour to the icing!

2-Use different nozzles to create different effects. Make sure you wait until your cakes are completely cool or the icing will just melt! (I’ve done this too)!

cakes.jpg

I was so shocked that it worked! I was jumping around my kitchen in sheer happiness that I had finally managed to use the piping bag without it being a huge mess! I cannot wait to try out more using different nozzles! They went down an absolute treat and the kids had a go using the bag too! A fun filled baking session!

Happy Wednesday everyone!

Simple chocolate chip cookies!

I love cooking and baking with my kids! As a child my Gran would often bake with us and I have learnt many recipes from watching and helping Gran in the kitchen. What she probably didn’t realise at the time is that those endless cooking experiences have turned into some of my most favourite childhood memories.

cook kids

I often look after my two year old nephew whilst my sister works and I am delighted that he seems to enjoy baking as much as I did when I was little. We decided to make some simple chocolate chip cookies the other day!

Chocolate chip cookie recipe – 110g butter, 175g plain flour, 165g chocolate chips, 55g sugar, 2 tablespoons of water, and few drops of vanilla extract.

1- Begin by preheating the oven to 160c.

2 – Add butter and sugar to a large bowl and mix well. Next add the vanilla and water, then stir in the chocolate chips and flour. Mix until you have a dough. (We tend to knead to form our dough – we do love messy hands)!

3 – Roll out your biscuit dough then use cutters to cut out your cookies. My nephew chose to make circle shaped and gingerbread men shaped cookies!

IMG_2054.JPG

IMG_2056.JPG


4 – Once you have cut out your cookie shapes lay them onto a baking tray covered with grease proof paper.

IMG_2059.JPG


5 – Bake for approx 20 minutes or until golden brown! We like to sprinkle some caster sugar over them once cooked.

IMG_2063.JPG

They tasted so good and certainly got a big thumbs up from my nephew!

IMG_2069.JPG


Yummy, simple chocolate chip cookies to bake as a delicious treat! Enjoy!


Oreo biscuit bakes!

My son loves Oreo’s! They are one of his favourite sweet treats so it was no surprise that he had an Oreo Easter egg for Easter. He kept one mini pack to one side as he wanted to make some of his favourite biscuits with them. We decided to make some the other day, so I thought I would share the recipe with you lovely people!  

Oreo biscuit bakes recipe – 110g butter, 55g sugar, 175g plain flour, 2 tablespoons of water, vanilla extract and mini Oreo’s (we use 1 snack pack – appx 150 g).

1 – Begin by preheating your oven to 160 c.

2 – Put the sugar and butter in a large bowl and mix until fluffy.

3 – Add a few drops of vanilla extract and the water and mix. Add the flour and Oreo’s and mix in well. (Break the Oreo’s up first into smaller pieces). Feel free to use your hands to form your biscuit dough!

4 – Roll out onto a floured surface and cut out your biscuits with a cutter. We used circle cutters this time but you can use whichever shape you like! Pop them onto a greased baking tray.

5 – Bake in the oven for approx 20 minutes or until golden.

IMG_1845 (2).JPG


These biscuits are super yummy and make a great simple treat to bake with the little ones at the weekend! For more kids baking ideas click here!

I hope you all have a super weekend!

Sweetie Cupcakes!

The one good thing about all this rain we are having here in Wales is that it gives me lots of time to bake with the kids! I love cooking and baking with the kids as it teaches them some very useful skills (as well as the actual cooking techniques) which they will need in later life including responsibility, confidence, reading and spelling, following instructions, and risk. It is amazing how much a little cooking activity can help kids when you really sit and think about what the activity is teaching them.

cook quot

As I had my niece and nephew with me too the other day I thought it would be a cute idea to make Sweetie Cupcakes with them all!

To make your Sweetie cupcakes you will need – For the cakes: 170g self raising flour, 170g butter, 170g sugar and 3 eggs. For the topping: 250g butter, 600g icing sugar and 2 tbs milk. To decorate: sweets of your choice (we used Smarties).

1 – Begin by preheating the oven to 180c and lining a cupcake tin with cake cases.

2 – Put the butter and sugar in a bowl and mix until fluffy. Add the eggs one at a time and mix together.

3 – Add the flour and mix well. Spoon the mixture into the cake cases and bake for approx fifteen minutes or until golden.

IMG_0638.JPG

4 – Allow the cakes to cool thoroughly. Now make your butter cream which will decorate the top of the cakes. Make the butter cream by putting the butter and sugar into a large bowl and mixing. Then add the milk and stir it in. Spread the butter cream over the cakes then decorate with sweeties! We used Smarties to add a splash of colour! The kids also decided to add some sprinkles and hundreds and thousands!

IMG_0640


IMG_0646.JPG

IMG_0647.JPG

Our cakes looked lovely and tasted really good! The kids loved them and they disappeared super fast! Hubby wasn’t impressed that by the time he returned home from work they had all been eaten! (Mental note to make more next time)!

Hope you are all having a perfect Sunday!

My Daughters Sticky Jam Cake!

My daughter loves baking and as she gets older she is starting to tweak and adapt recipes so that they suit her own personal tastes. I love that she has her own ideas when baking and that she doesn’t feel she has to strictly follow recipes.

She decided to make her own recipe for jam cake the other day and I thought I would share it with you all (with her permission of course)! Be warned – this is a pretty sticky cake! She has a sweet tooth like most kids!

Recipe for Sticky Jam Cake – 125g butter, 200g self raising flour, 30g icing sugar, 3/4 tsp salt, 6 eggs, 1 tsp vanilla extract, 1 tbs cold water, 230g berry jam (we used strawberry), 400g granulated sugar.

1 – Preheat oven to 180c and grease a baking tin. (Ignore that my daughter is greasing two tins, she was making  a cake for a friend too)!

IMG_0149.JPG

2 – Put the butter into a mixing bowl and mix until creamy. Then add 150g of the flour, the icing sugar, water, vanilla and half teaspoon of salt. Mix until you have a ball.

3 – Put the ball into the tin and press it down to form an even layer covering the tin bottom. Refrigerate for 10 minutes.

IMG_0158.JPG

4 – Once chilled, bake for approximately 15 minutes. Then let it cool completely. Reduce the oven temperature to 170c.

5 – Once the base is cooled, spread the jam over it evenly.

IMG_0160.JPG

6 – Mix the eggs, sugar, remaining flour and the remaining salt in a bowl, until smooth.

7 – Pour the egg mixture over the base and spread it out so that it is even.

IMG_0167.JPG

8 – Put into the oven until the top is set. This usually takes about 30 minutes. Once cooked, let it cool completely, remove from tin and then serve!

My daughter served hers with strawberries to complement the jam flavour. Raspberries would also work brilliantly if you use raspberry jam.

This is a super delicious cake which is a family favourite in our home, thanks to my wonderful baking daughter! A lovely weekend treat!

Chocolate spread muffins

I felt like doing a little baking the other day with my two year old nephew. I wanted something simple in which he could really participate and get involved with! One of my favourite childhood memories is baking with my grandma when I was a little girl! I honestly feel that it is never too early to start baking with your little ones. Plenty of adult supervision and it is huge (messy) fun!

gran bake

He loves chocolate so I thought chocolate spread muffins would be a good option, and a little more interesting than plain chocolate muffins!

Chocolate spread muffins ingredients – 200g self raising flour, 1 egg, 75 ml vegetable oil, 125 ml milk, 100g caster sugar, chocolate spread and 1/2 tsp salt. (Makes approx 10 muffins).

Preheat oven to 180C. Beat the egg in a large bowl and mix in the oil and milk. Then add the sugar. Add the flour and salt and mix until you have a smooth batter.

Next spoon some mixture into each cake case. Fill each case up about halfway.

IMG_0129.JPG

Once you have some mixture in each case add two spoons of chocolate spread into each case, then cover with a spoon of the batter mixture. (Make sure you add plenty of the spread as a lot of it will disappear during baking)!

Bake in the oven for approximately 12 – 15 minutes or until golden.

We thought our chocolate spread muffins were yummy and it is a nice surprise when you bite into the muffin and discover the chocolate taste! My nephew really enjoyed helping to make the muffins and he certainly enjoyed eating them!

Festive Jam Bakes!

One of my family’s favourite bakes are jam tarts. My grandma used to make them for me when I was a little girl, and now I make them for my two little ones (and my hubby)! The only difference is that my kids especially love my pastry so I make the tarts quite thick, and we call them jam bakes.

My kids don’t particularly like mince pies, so I thought it would be nice to make some jam bakes with a festive twist this weekend!

Festive Jam bakes recipe – 350g (12 oz) plain flour, 3 tsp caster sugar, 1 tsp salt, 175g (6 oz) butter, 120ml COLD water and jam of your choice (Makes 12 bakes).

Begin by putting the flour, salt, sugar and butter into a bowl and mix until you have something similar to breadcrumbs.

IMG_3630.JPG

Next, add the water slowly and mix until it forms a ball. (I always use my hands for this part). Then chill for 30 minutes in the fridge.

IMG_3632.JPG

Once chilled, preheat your oven to 180c and grease a cake tray. Roll out the pastry then use cutters to cut out rounds. Place the rounds into your tray and cook for 10 minutes. Whilst they are cooking, use the remaining pastry to cut out some shapes for your toppers. I used a star cutter to give the bakes a more festive feel!

IMG_3633.JPG

When the bake bases have cooked for the 10 minutes, take them from the oven and add some jam into the centre of the bases.

IMG_3634

Add your topper to each of your bakes.

IMG_3635.JPG

Cook for a further 10 minutes, until golden brown.

We ate our jam bakes with cream whilst watching a Christmas movie. A very yummy sweet treat!